Pages

Introduction

I hope this site is of value and contains information. I will record my ramblings regarding sailing adventures, my boat projects and anything else that might interest people attracted to a site about Wharram catamarans.

Please visit again for updates and do leave your comments.


Monday 6 August 2018

Bowsprit Construction

I've been asked a few times about the bowsprit on Gratitude. I thought I'd written this up, but hadn't, so here goes. Better late than never.

The bowsprit and spinnaker project was finished last year and has been a success. The asymmetric is not perfect, but does pull well at true wind angles around 135°. Once moving at 6 to 8knts, the apparent moves forward and the wind is almost on the beam and the sail works well. I've hit 14.3knts (yes that's out of control). On flat water it really moves well, even in light winds. Last weekend I sailed over 36nm in a swell using the asymmetric. I did take it down for a bit as we were starting to go too fast (10knts), we put it back up as things settled again. We averaged around 6knts over the ground. The sprit worked perfectly despite the visible flexing under some force.

The sprit is made from an old wind surfer mast section. The lower part of a mast is ideal and really strong. I experimented with the thin end, and snapped it like a twig!
I got the mast by asking if anyone had old masts to spare on a local windsurfing Facebook page. To fit the mast, I set it up on land to check the angles and position.
The angle from the front beam and under the bridle works well. It needs to be fixed under bride, at the beam to stop it moving left to right, and it needs guys to resist the upward and left right forces at the front end.

Fixing at the beam

The fixing at the beam works because the spirt is pulled back hard towards the beam by the guys. I used a solid rubber dog ball from a pet shop to make a foot to fit over a feature on the front beam's web. Here's the arrangement set up using a prototype wooden foot.
I cut a slot into the dog ball using a router.
Next I cut a circular slot on the other side to seat the rim of the tube into. I cut this using a core drill.
I pushed the tube into the slot which was first filled using a hot glue gun. 
This fixing cushions the sprit and locates it on the font beam once the guys pull the sprit back hard. Also, in extreme situations, like a broach, the foot pulls to one side and out so that everything comes undone, which is better than breaking the pole.

Fixing at the bridle

This fixing is a simple lashing arrangement. I feel it could be improved with some kind of a seat under the bridle to sit the sprit into, however its simplicity is appealing. Here's a test version of a lashing.

Guys

The guy line arrangement key to the design. It runs from the steel bridle U-bolt on one bow to a pad eye on the underside of the tip of the sprit, down the length of the spirt to a highfield tensioner and back to through the pad eye and down to the other bow U-bolt. 

Here's the pad eye which is pop-riveted to the spirt using stainless rivets.
Also shown is the up-standing block for the tack line which connects to the tack on the spinnaker. Note the both fittings are riveted, and a plastic insulating tape is used to isolate the metal from the carbon sprit. This is to reduce the possibly of galvanic action, which I'm told can affect carbon/metal interfaces.

The guys are 3mm dynemma. The design relies on the minimal stretch. Another important addition to the design is a knot in the guy cord to create a loop for the highfield. This stops the guy line slipping through the pad eye and highfield as the sprit is pulled side to side. Here's the highfield which was bolted to the tube, again with insulating tape at the interface. It's positioned close enough to the end to allow me to get the nuts in place on the inside.
The loop goes over the highfield hook and when pulled back the sprit is forced onto the front beam and the tension in the guy stops the tip of sprit lifting up or moving side to side. The tension in the dyneema is significant. It takes all my strength to pull the level over and the snap back as it goes over-centre runs the risk of catching fingers. The dyneema is so good that after a season, it was still tight.

Here's the knot in the guy cord shown on the fitted sprit.
I clipped the guy lines to the bow U-bolts using stainless steel snap hooks.
Spring Snap Hook - Stainless Steel Marine Grade 316
I could do with some extra pictures of the whole thing, and I'll try to get some. For now, just get in touch if you have any questions.

Here's the finished product complete with the asymmetric.

Tuesday 17 July 2018

Sore Behind

On a passage, finding a comfortable place to sit on a Tiki 21 is not so easy, especially if you're on the helm.

The best place is asleep on the tramp, but that's no use to the skipper.


I spend most time either on the bench seats in the cockpits ...


.... or on deck using a camping seat.


The problem with the bench seats is they need padding, and are too narrow. This means you're sitting too upright and can easily slip off the front. A few years ago I added some padding to the original seats. I searched around for some good quality closed cell foam but it always comes in too large a sheet and too expensive. Then I discovered foam mat flooring tiles.

Foam Mats

These were cut, finished with sand paper to round the edges and glued to the ply bench seats.

Small Bench Seats

Whilst this was an improvement, it's still "hard going", if you'll excuse the pun.

With a trip coming up on the weekend, I couldn't face the discomfort and I have a source of nice ply so I've made wider seats. Again these have had foam added.

Old and New Seats

Hopefully this will be less of a pain in the arse!

Wednesday 13 June 2018

Auto Tiller Prototype

In a weak moment and with an impulsive click on eBay,  and an auction was won. The TP1000 auto tiller was mine!

As the victory faded, attention turned to how it would work. An auto tiller is designed to simply connect to a tiller in the middle of a boat. What could be simpler?

They connect at around 30cm (1ft) from the pivot point and have enough power and reach to push and pull the tiller and control the boat. They have a built in flux-compass. Press the button, and it keeps you going on a fixed heading.

The trouble is, my Tiki 21 has two tillers, with a cross bar linkage. The tillers are nearly 2 meters long. It might be possible to mount the auto tiller on one tiller a foot from the rudder and it would work. However, it would be well out of reach. Some research was necessary. How to connect the control unit?

Here are a few examples:

In the idea below, an extra stub tiller at 90 degs is added to the tiller and the auto tiller uses a long extension bar.


Of course, I also checked out Roger's blog which is full of useful information. In the end it's Roger's basic design that makes sense. However, I can't easily use the track and chain linkage like Roger as my rear beam has mainsheet and genoa cleats in the way.


In Roger's design above, the auto tiller can be quickly released and different chain links selected in the drive chain. Whilst I'm not going to use the track, the rope arrangement seems the best choice.

In the drawing below the ropes run around and cross over to drive the tiller arms. The auto tiller needs to grip the rope which runs across the rear beam.
The blocks shown here can simply be attached with rope. But a way to connect the auto tiller to the hull and to the rope is required.

To fix the auto tiller, I made a simple block out of two discs of ply epoxied together.
With a hole in the middle to accommodate the tiller pilot pin, it just needed epoxying to the boat. 
An area was masked off on the hull just behind the rear beam and the finished mount stuck on and painted. After this was fixed, I set the boat up in the yard with the control lines and blocks in place. Then I positioned the auto tiller to see how the whole thing looked.
It looked fine. I just needed a way to get the shaft on the pilot to grip the rope. This was tricky as it needs a release mechanism. 

I turned to the 3D printer. Here's the first prototype. The lever rotates an off-centre cam which moves a plate to grip the line.
At the bottom, you can see the half tube shape. Another piece fits over the tiller pilot shaft and is screwed on to grip. This design is ok, but is a bit complicated. The moving plate is unnecessary. The first prototype was also flimsy and needed beefing up. 

Here's the second version in which the cam grips the rope. This prototype has the top parts screwed on and is in the release position.

Here's the same thing with the level in the grip position and the cam is seen compressing the rope.
Finally here's the working version which was printed with thicker walls and a slightly improved design. And yes it works. I'll update once it's been tested in all bit calm conditions.


Friday 25 May 2018

Trampoline Maintenance

It's been an odd spring this year. We had proper snow that blocked the roads. It rained a lot and was bloody cold. These factors stopped the sap from rising and Gratitude remained in hibernation for longer than normal.

The list of maintenance work was as long as ever and took even longer. One nagging problem is the trampoline built 4 years back. The eyelets/grommets just pull out even though the material is quite thick. This is mainly a problem on the front and rear edges of the tramp, the sides seem ok.

Last year I replaced the worst grommets with new 'spurred' grommets hoping this would help.

It did help, but the original holes are stretched and damaged. So this year I decided to try an make a better repair. So for each of the damaged holes:

1. Took out the old grommet
2. Cut two disks of new material and using a hot glue gun, I've stuck these one each side. I then stitched the whole thing together on the sewing machine using polyester thread. This created a strong stiff patch and allowed me to reposition the perimeter of the old hole back to where it will be gripped by the new grommet.
3. Next I needed to cut new holes. This was a problem when I made the tramp and probably the cause of weak holes in the first place. So this time, I came up with a new way to cut the holes using a heated copper pipe.
4. Pressing the hot pipe melts the material and creates a clean hole with a sealed perimeter. 
5. Finally the new grommets were inserted.
Let's see if this works. It will last the season I'm sure. 

If this doesn't work, perhaps I'll make a new tramp. I'm thinking this alternative design would be better. In this design, the hem forms a long pocket which has semi-circles cut out. A fibreglass rod is thread through the pocket and the lacing goes through the cut-outs and around the rod.


Saturday 10 June 2017

Real Sailors

As ever, we were late starting and guess what? It was on the nose!

I'd watched a series of forecasts over the preceding 10 days: Windguru, UK Met office, XCWeather. None agreed, all changed with regularity. What was common was the clear, dry weather would end the day of our departure. If only I could press a pause button when the forecast was favorable.

On the Friday evening before departure, I set off to Gratitude to load provisions and camping gear. The east wind blew so hard across the estuary, that I abandon the idea, fearing the lee-shore in a cheap dingy with only oars.

Friday night was curry night and a late one with my crew travelling from London and Blackburn. Several drinks later, the alarm was set for 5am it was off to bed.

For once we were at least at the boat early. After loading up, I followed my skipper's course instructions and actually did a briefing. The plan was to make a full day's pilotage south down the coast and then west. With a strong southerly, it was clear that this might not happen .


The first sign of trouble was a passing a small fishing boat returning to the river with the skipper shaking his head. Looking out to sea, we began to understand the problem. The swell from the previous day's easterly was now mixing with a southerly chop. Grey clouds and white caps made for an unappealing seascape. An attempt was made to cut out the long fairway, and nip through a gap in the sand bar and head south. No sooner than we set on a southeasterly beat, we could see something blocking our way. Our route was cut off by a huge floating dredge pipe that's working to pull in sand to fix erosion on the Warren.

Attempts to sail south were further thwarted by the chop and strong winds. Rick was silent and we soon discovered he'd 're-enjoyed' his curry. We pushed past the dredge pipe and headed into the coast to gain what little shelter we could find. From Teignmouth the engine worked hard until we finally made shelter at Ansty's cove where we heated some food and considered the plans.

A nice curry, again.


I was keen to make some distance, but felt that Torquay might be the only sensible option. After some warmth and with renewed energy we headed off around Hope's nose and into Torbay where conditions were a little better. The day began to take shape, at last.

With our early start we made Dartmouth despite the conditions. We had too much sail up coming in towards the river mouth at 10 kts. Finally we reached shelter and Rick (our new recruit) was rewarded with the Tolkienesque entrance to the river. We had time to kill before we could push up to Tuckenhay on the tide and so it was ice cream and pub time.


Dartmouth is a wonderful place, and the motor up river was beautiful. We had occasional glimpses of the sun, but with the evening drawing in, the wind chill dominated the journey.


As expected, the bank holiday and evening spring tide, filled the Tuckenhay pontoon with a crowd of boats up for the evening. We rafted up next to a bigger cat from Topsham and poured a gin and tonic to prove that we too had our luxuries, including ice!


By the time our pub supper was washed down with beer, the pontoon was clear and us sea gypsies could spread out once more. Pontoons are great for boats with tents.


The first day had been long. Water was everywhere and we'd lost electrical power. We sponged out, fixed camp and bedded down hoping for better weather to come.

The second morning's conditions were a secret. Hiding several miles inland, with no internet or phone signal and in the bottom of a wooded valley wasn't not an easy place to assess your sailing plan. We showered, made breakfast and we motored back down river checking the clouds for speed and direction. Soon enough the phone signal brought a weather update. A brisk easterly was forecast but nothing too bad. Downwind sailing is easy right?


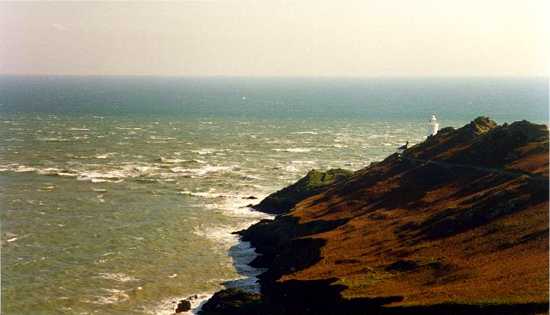
On reaching the sea, we set a course for Start Point in a nice breeze and pleasant conditions. 'This is more like it', I was thinking. A little distance from the point we rounded with the last of the fair tide and into the slack water. Start Point has a bit of a reputation and we were on a big spring tide, so timing was important.

By this time we had my home made spinnaker up and it was working well. We heading along the coast at increasing speeds. We had fun watching the GPS. The boys called out the numbers. "Ten knots... twelve! ". As the bucketfuls of cold, salty water were thrown in our faces, we watched the gap to the 40 footer ahead of us close. This should all be a signal? By now we'd passed Salcombe and were below the cliffs at Bolt Head and Bolt Tail. The boat behind had dropped sails, and was gone, presumable into Salcombe.

"14knts .... ", shouted Rick as the water began slapping hard from underneath, dislodging the central platforms, requiring us to sit on them to keep them down. It was at that point I realised my error. Caught up in speed records and the prospect of overtaking a big boat, all sails blazing, I'd not read the signs. We should have reduced sail waaaa....yyy back! We headed down wind, dropped the spinnaker, reefed and hoisted the working jib: a good move.

We screamed along the coast, put in another reef, went just as fast and entered Bigbury Bay. Heading up toward Burgh Island, put us on a reach. I had to keep baring away as we just went too fast and the leeward shroud looked like a loose halyard. Slowly things eased as we neared Bantham and the Island. There wasn't enough water in the river, so we retreated behind the island. A warm drink from the flask allowed an assessment of the conditions, which were clearly improving. We headed down the coast to Mothecombe beach, our intended first day destination.


Bumping onto the sandy beach with the rising tide, we felt it was important to fully enjoy the lovely weather with a beer. It was more a celebration of the dying wind. After watching goose pimpled swimmers and chatting to interested boaties on the beach, we debated the wild camping option for the night, but as the surf turned us side onto the beach, we started the engine and headed for the comforts of the nearby
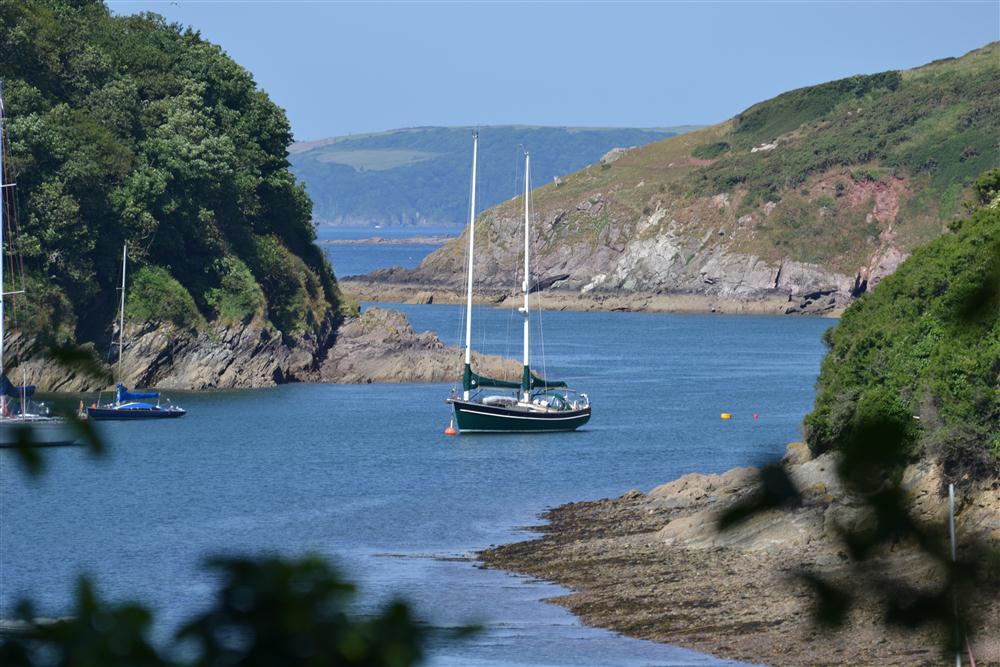
 river Yealm.

The wind was now a sensible force 3, and it was a downwind sail to the Yealm and Noss Mayo. Pulling up to the visitor's pontoon for the second time in a month (the first time on a 30ft Bavaria during my Day Skipper practical) it seemed that, once again, Noss Mayo was the limit of my cruising on Gratitude as the next day we'd be turning around and making our way home. We pitched the tent, chatted with the other boats and ate our supper. I was a bit put out by one woman who asked "are you on an expedition?". Hardly, I thought as we pumped up the dinghy and made for the pub.


The next morning I peered out into the mist and promptly went back to sleep. Perhaps we were on an expedition, we'd certainly had every type of weather. Breakfast was prepared in anticipation of another day's adventure as we chatted to the harbour master about the fog he'd seen on his early morning run out the the river mouth. A quick shower and with all the safety gear I could muster, we were into the bay. It was calm, the sun was trying to come through as the fog rose and fell. A fog horn could be heard some way off, and it was getting closer. But, we're not that far out into the bay right?


That's close enough, thank you. 

We passed a few yachts as the conditions improved. My new pilot plan for the day was relaxed. We'd follow the now westerly wind back to Salcombe for the final night. Event free sailing it was. A good lunch on deck as we sailed along in the thin, lifting, fog and faint sunshine. 


Salcombe looked delightful and the harbour master gave us a warm welcome and options for the night. We elected for the pontoon, hoping to spread once again. We rafted on the busy pontoon and celebrated with excellent rum and ginger. Sadly, the ice was now gone.


The water taxi scooped us up from the end of the pontoon and into town, stopping off to collect crews from boats very different to ours. People emerged from cockpits dressed in what you might call après-sail attire. We asked the time of the last taxi and disappeared into the town for a good restaurant meal.

Returning to the harbour office, I asked for the last taxi to the visitors pontoon and was met with the tone of a man ready for bed. Others joined the taxi and we sped up and down between moorings. The driver gave some a hard time when they couldn't pick their (large) boats out amongst the many other large boats. We were last and wondered what whip of the tongue we'd be dealt. "Now I'll drop off the real sailors", he said!

The next morning was the last. It was a late night and an early start to get to Start Point with the fair tide. We packed quickly and got away early as Peter had decided against the tent and braved a shower or two on deck with a tarpaulin for back up.

We sailed at a leisurely 3 to 4 knots toward Start Point, measuring our speed against other boats. We tried various sail arrangements and angles and enjoyed the best of the weather so far. Start Point delivered a few long standing waves and some great wildlife.


As we made our way east the wind increased and we even prepared for a squall that never came. (So I am learning). As we made our way north we were reaching and covered the ground at speeds between 4 and 9 knots. It wasn't long before we swept across Torbay and around into Ansty's cove for a last lunch. Again we headed north reaching at speed and made Exmouth in time for the full ebb to exercise the outboard one last time.


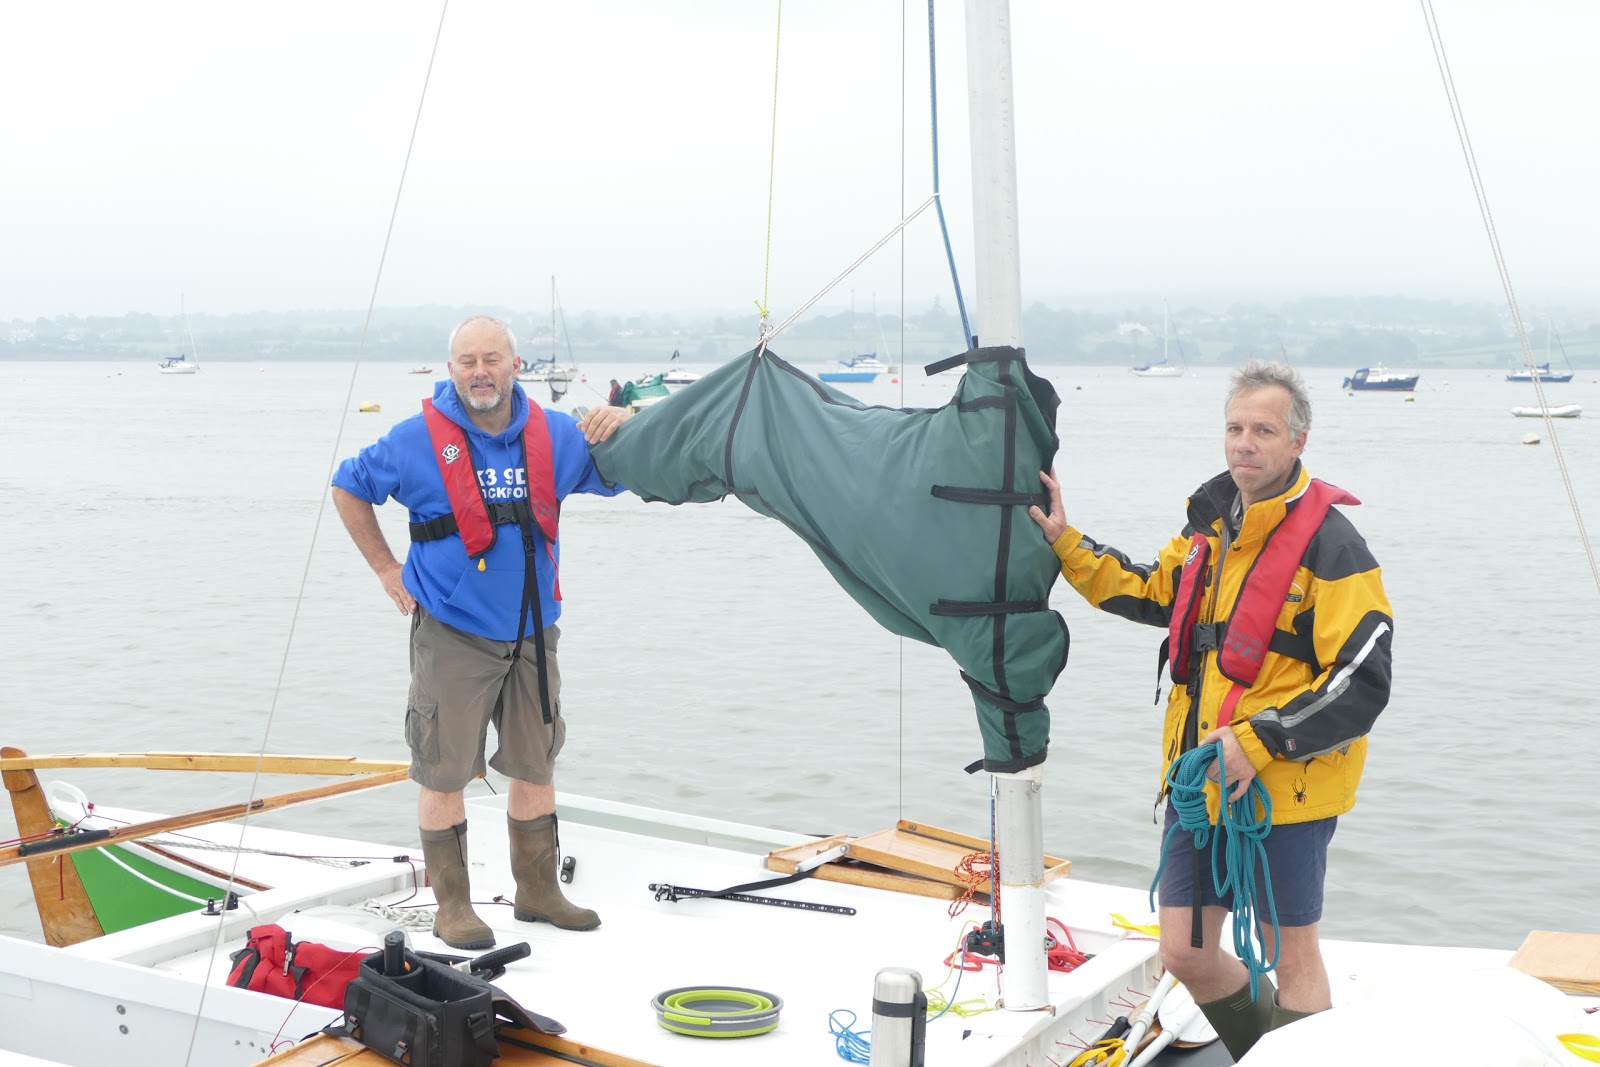
What a great boat a Tiki 21 is. What other 21ft boat has space for three blokes and can carry a pace. As they say "the smaller the boat the bigger the adventure".